Are you contemplating getting I-tip hair extensions? Known for their flexibility and durability, I-tip extensions are a popular choice for those seeking a natural look without using heat for installation. This comprehensive guide will explore what I-tip extensions are, how to install them, their longevity, cost, the potential for hair damage, and how they compare to K-tip extensions.
What are I-tip hair extensions?
I-tip hair extensions are a popular type of hair enhancement that involves attaching small strands of hair to your natural locks using a micro-link system. These extensions are known for their durability and the ability to offer a natural, seamless blend without the use of heat, which is a significant difference from other types such as K-tip extensions that require heat for bonding. Gaining popularity for their versatility and the health-conscious approach to hair extensions, I-tips allow for both fullness and length with minimal risk of damage. This method stands out from others like tape-ins or weaves by providing a more permanent solution that can be adjusted as natural hair grows, offering a balance of longevity and maintainability.
How to install I-tip hair extensions
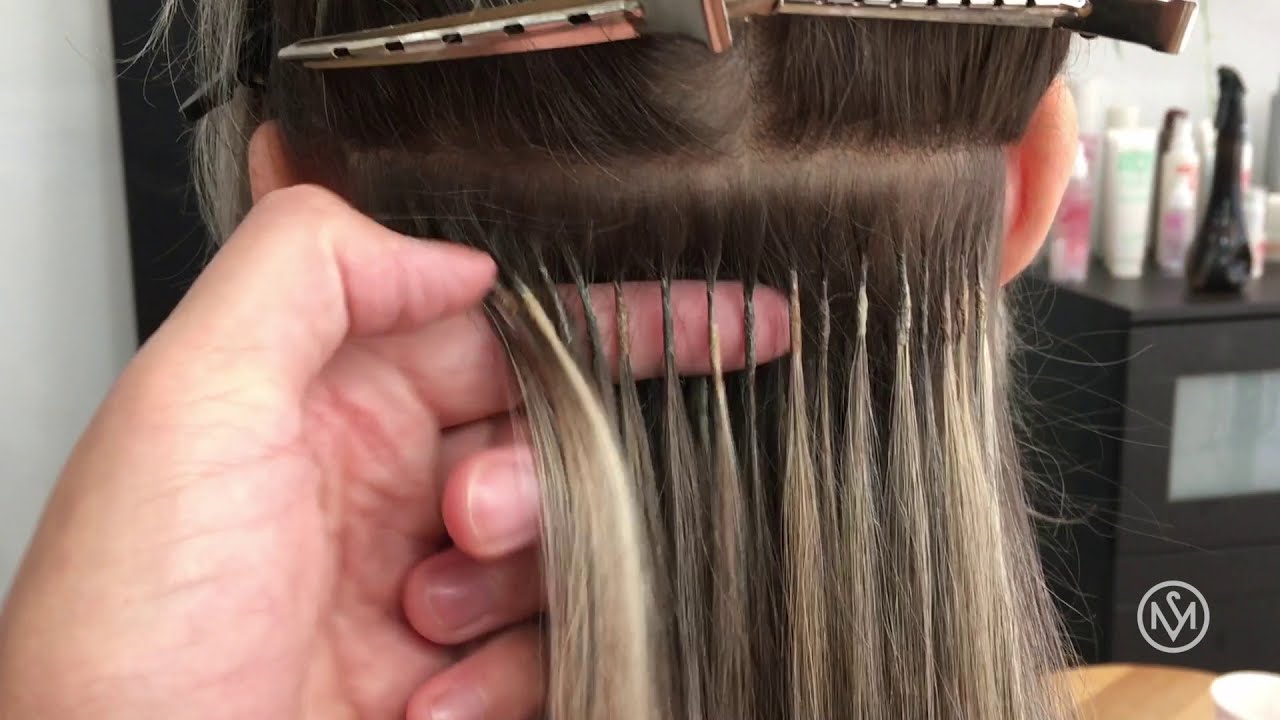
Installing I-tip hair extensions is a detailed process that involves attaching each extension strand to the natural hair using a micro-bead or ring. Here’s a general overview of how to install them:
- Sectioning the Hair: Start by dividing the hair into sections. Work from the bottom up, securing most of the hair on top and leaving a thin section at the nape of the neck to begin the application.
- Preparation: Take a small section of your natural hair where you want to attach the extension. The section should be roughly the same thickness as the I-tip extension strand.
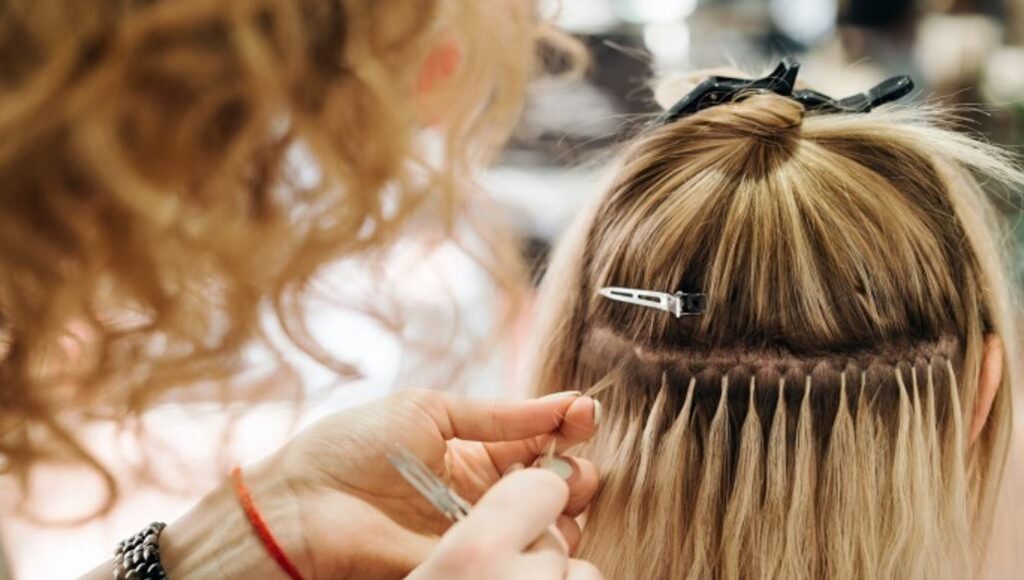
- Inserting the Bead: Thread the natural hair section through a micro-bead using a special threading tool, which often looks like a loop or hook.
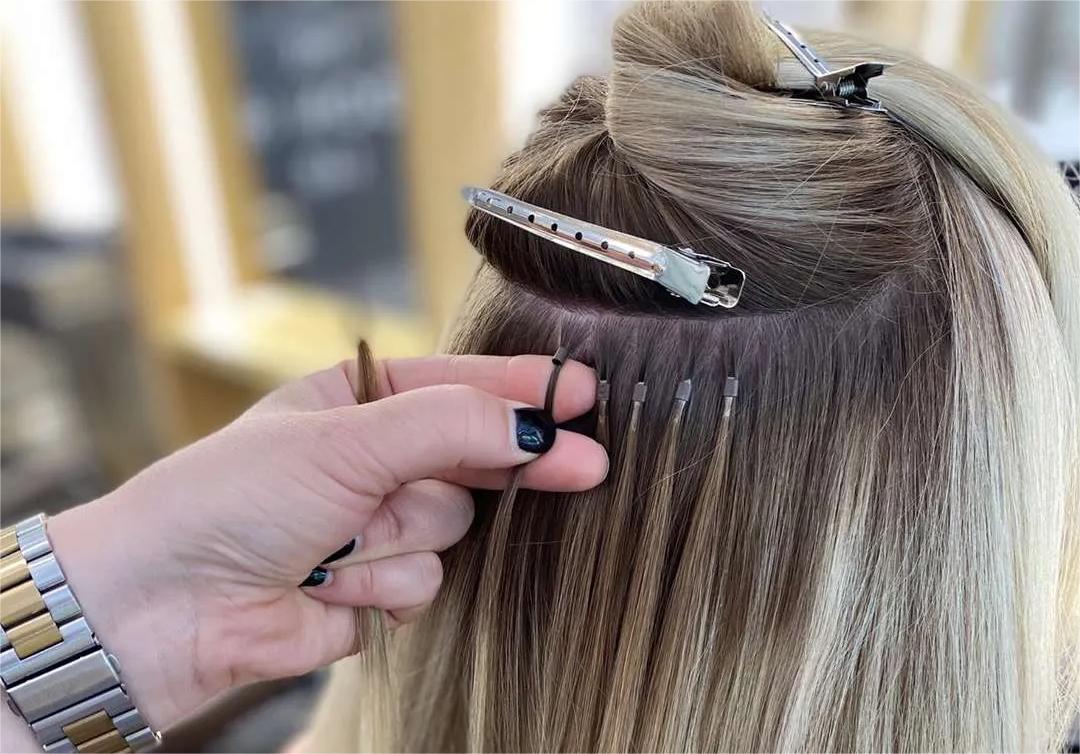
- Attaching the Extension: Insert the I-tip (the stick-like tip of the extension strand) into the bead alongside the natural hair.
- Securing the Bead:Use pliers to clamp the bead securely in place, ensuring that it is tight enough to hold the extension but not so tight that it damages the hair.
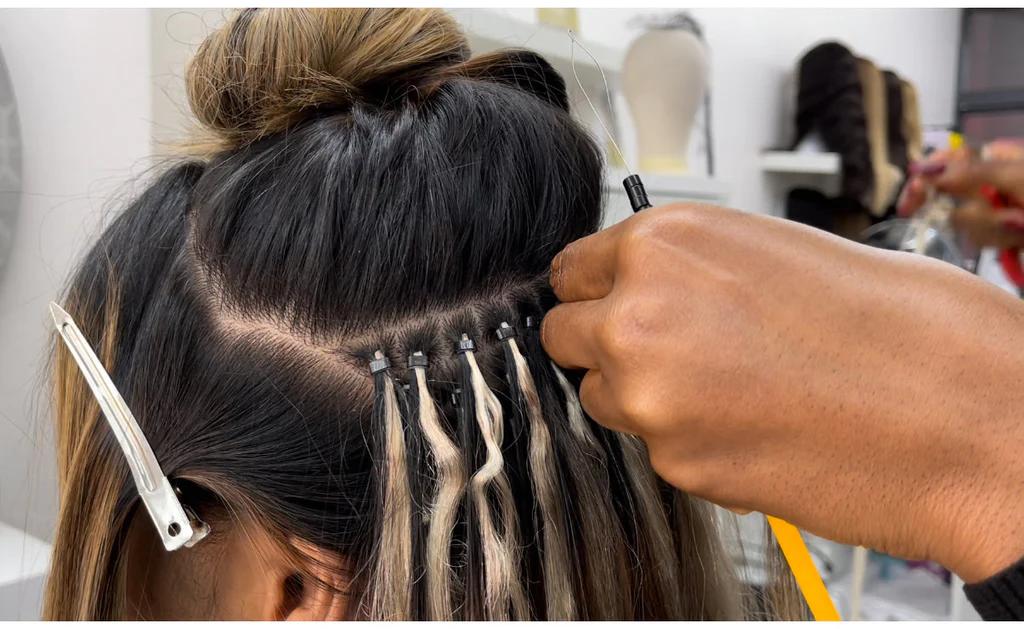
- Repeat: Continue this process, working upwards in rows and section by section, until you have achieved the desired volume and length.
- Blending: After all extensions are applied, it’s important to blend them with your natural hair. This may involve cutting or styling to ensure the extensions are not visible and create a seamless look.
This method does not involve heat, making it a preferred choice for those looking to minimize potential hair damage. Professional installation is recommended to achieve the best results and avoid issues like bead slippage or uneven weight distribution, which can lead to breakage.
How long do I-tip extensions last?
I-tip hair extensions can last for about 4 to 6 months with proper care and maintenance. The longevity of these extensions can be influenced by several factors, including the quality of the hair used, the method of application, and how well they are maintained.
Since I-tip extensions are attached using a micro-bead system that clamps the hair and extension together, they need periodic adjustments. As natural hair grows, the beads can move away from the scalp, making it necessary to have them moved up every 6 to 8 weeks to maintain the natural look and prevent any pulling or strain on natural hair.
The maintenance routine also plays a crucial role in how long these extensions last. Proper brushing, using suitable hair care products, avoiding harsh chemicals, and gentle handling during washing and styling can help extend their lifespan and keep both the extensions and natural hair healthy.
How much are I-tip extensions?
The cost of I-tip hair extensions can vary widely based on several factors including the quality of the hair, the amount needed, the expertise of the stylist, and geographic location. Here’s a general breakdown of potential costs:
- Quality of Hair: I-tip extensions can be made from synthetichair, Remy hair, which is high-quality real human hair with the cuticles aligned, or virgin hair, which is untreated real human hair. Prices increase significantly with the quality of the hair, with Remy and virgin hair being the most expensive but also offering the most natural look and longest lifespan.
- Quantity and Length: The more hair you need, either for length or volume, the higher the cost. Also, longer extensions tend to be more expensive than shorter ones.
- Professional Fees: The cost for application will vary based on the stylist’s experience and your location. More experienced stylists or salons in metropolitan areas often charge more due to higher demand and overhead costs.
Typical Cost Ranges
- Lower End: For synthetic or lower-quality human hair, costs might start from $100 to $300 for the hair plus an additional $100 to $200 for installation.
- Mid Range: For better quality, especially Remy hair, prices can range from $400 to $800 for the hair and installation.
- High End: For top-quality virgin hair in longer lengths, total costs including installation can easily exceed $1,000.
Additional costs may include maintenance visits for moving up the beads as your hair grows, which typically occur every 6 to 8 weeks. These maintenance appointments can cost between $100 and $200 each time, depending on the salon and the amount of adjustment needed.
It’s important to consult with a few different stylists to get quotes based on your specific hair needs, and to ensure you understand all the costs involved before proceeding.
Do I-tip extensions damage hair?
I-tip hair extensions are generally considered one of the less damaging types of extensions, especially when compared to methods that involve heat or glue. However, like any hair extension, they can potentially cause damage to natural hair if not installed, maintained, or removed correctly. Here are some considerations regarding the potential for damage with I-tip extensions:
Potential risks
- Tension and Stress: If the micro-beads are clamped too tightly, they can put unnecessary stress on the natural hair, leading to breakage or stress alopecia, especially in finer hair.
- Weight: Extensions that are too heavy for the natural hair can also cause tension, leading to breakage or hair loss. It’s important that the weight of the extensions is suitable for the wearer’s natural hair density.
- Slippage: Incorrectly secured beads can slip, causing tangled hair and potential damage when brushing or styling.
Preventative measures
- Professional Application and Maintenance: Having I-tip extensions installed, adjusted, and removed by a professional can significantly reduce the risk of damage. Professionals can ensure that the beads are neither too tight nor too loose, and that the weight and amount of extensions are appropriate for your hair type.
- Proper Care: Regular maintenance, including gentle handling, using the right hair care products, and avoiding pulling or tugging on the extensions, helps minimize damage. Regularly scheduled appointments to adjust the position of the beads as your hair grows are also crucial.
- Quality Extensions: Choosing high-quality hair and micro-beads can also reduce the risk of damage, as better materials will generally be easier on your hair and last longer without degrading.
When these factors are carefully managed, I-tip extensions can be a safe and effective way to add length and volume to your hair with minimal risk of damage.
K tip vs I-tip extensions: What’s the difference?
I-tip and K-tip hair extensions both offer unique benefits and have some distinct differences in their application methods and impact on natural hair:
How are k-tips and i-tips applied?
- I-tip Extensions: These are applied without heat. Each I-tip extension is attached to natural hair using a small bead or ring that is clamped around the hair and extension tip. This cold fusion method is considered less damaging to the hair.
- K-tip Extensions: Also known as keratin tip or fusion extensions, K-tips are applied using a heat tool that melts the keratin at the tip of the extension to bond it directly to the natural hair. This method is known as hot fusion.
How do k-tips and i-tips impact hair?
- I-tip Extensions: Since no heat is involved, I-tips are generally less damaging to the hair. They are ideal for those who are concerned about heat damage or have finer hair.
- K-tip Extensions: The use of heat can potentially weaken the natural hair and lead to damage, especially if not applied correctly or if the wearer’s hair is particularly vulnerable.
Maintenance and longevity of i-tip and k-tip hair extensions
- I-tip Extensions: These can be adjusted as the hair grows out by unclamping the bead, moving the extension up, and reclamping it. This makes maintenance potentially easier and allows for the extensions to be reused.
- K-tip Extensions: These are generally not reusable. As the hair grows, the bond moves further from the scalp and the extensions need to be removed and new ones applied.
How do we feel wearing each of them
- I-tip Extensions: The bead attachment allows for more flexibility and natural movement of the hair, which can feel more comfortable and less restrictive than K-tips.
- K-tip Extensions: While they offer a very natural integration with the wearer’s hair, they can sometimes feel heavier and less comfortable due to the bonding method.
Choosing between I-tip and K-tip extensions often comes down to personal preference, hair type, lifestyle, and the desired amount of maintenance. Both types offer effective solutions for enhancing hair volume and length, but the method of attachment and potential impact on natural hair differ significantly.
If you want more details, here is a more comprehensive comparison between i-tips and k-tips. With that guide, you can do an informed decision when selecting the right hair extensions for yourself.
Summing up
Choosing I-tip hair extensions offers a fantastic balance between versatility, natural appearance, and hair health. These extensions provide a durable solution that can be adjusted and reused with minimal impact on your natural hair, thanks to the cold application process. Ideal for those seeking a less permanent option than K-tip extensions, I-tip extensions cater well to lifestyle flexibility and styling freedom. Before making a decision, consider your hair’s health, your commitment to maintenance, and your styling needs to ensure that I-tip extensions are the perfect fit for your hair enhancement goals.